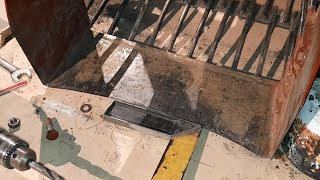
How to get perfect edge banding results every time. This is for beginners and how the pro's do it and it is easier and quicker than you think. You can apply edge banding in about 5min or less. I would recommend that you use edge banding that has glue on one side. There are other types of edge banding that has no glue and I would not recommend using that if this is your first time using or applying edge banding. I have a link below to the edge banding that I use for all my projects below under "Materials List". The fist step is to sand your edge perfectly smooth. Next you want to clean your edge from any dust . After that you want to heat up your iron and make sure that the steam function is turned off. Apply heat till the edge banding is hot to the touch. Let the glue dry for about 30min before trimming and sanding.
📝 MATERIALS LIST
• 3in Maple Veneer | [ Ссылка ]
🧰 TOOLS
• Iron | [ Ссылка ]
• Edge Banding Trimmer | [ Ссылка ]
• Edge Sanding Guide | [ Ссылка ]
• Orbital Sander | [ Ссылка ]
👣 FOLLOW
Subscribe — [ Ссылка ]
Instagram — [ Ссылка ]
Facebook — [ Ссылка ]
Twitter — [ Ссылка ]
Pinterest — [ Ссылка ]
------------------ SOFTWARE -------------------
• Adobe Creative Cloud | [ Ссылка ] (Optional)
• SketchUp | www.sketchup.com (Optional)
📹 FILMING EQUIPMENT
• Main Camera | [ Ссылка ]
• Main Lens | [ Ссылка ]
• Secondary Lens | [ Ссылка ]
• Audio Camera Mic | [ Ссылка ]
• Voice Over Mic | [ Ссылка ]
• Lights | [ Ссылка ]
• Laptop | [ Ссылка ]
• Editing Software | [ Ссылка ]
#Woodworking #HomeImprovement #DIY
@festoolusa
DISCLAIMERS | Some of these links have an affiliate code, if you purchase tools or gear with these links I will receive a small commission at no additional cost to you. This helps cover my build materials. Thank you!


![Пару минут и тебя накроет! | MEOW - 2 серия [4K]](https://s2.save4k.ru/pic/pNBJ8gGhX88/mqdefault.jpg)