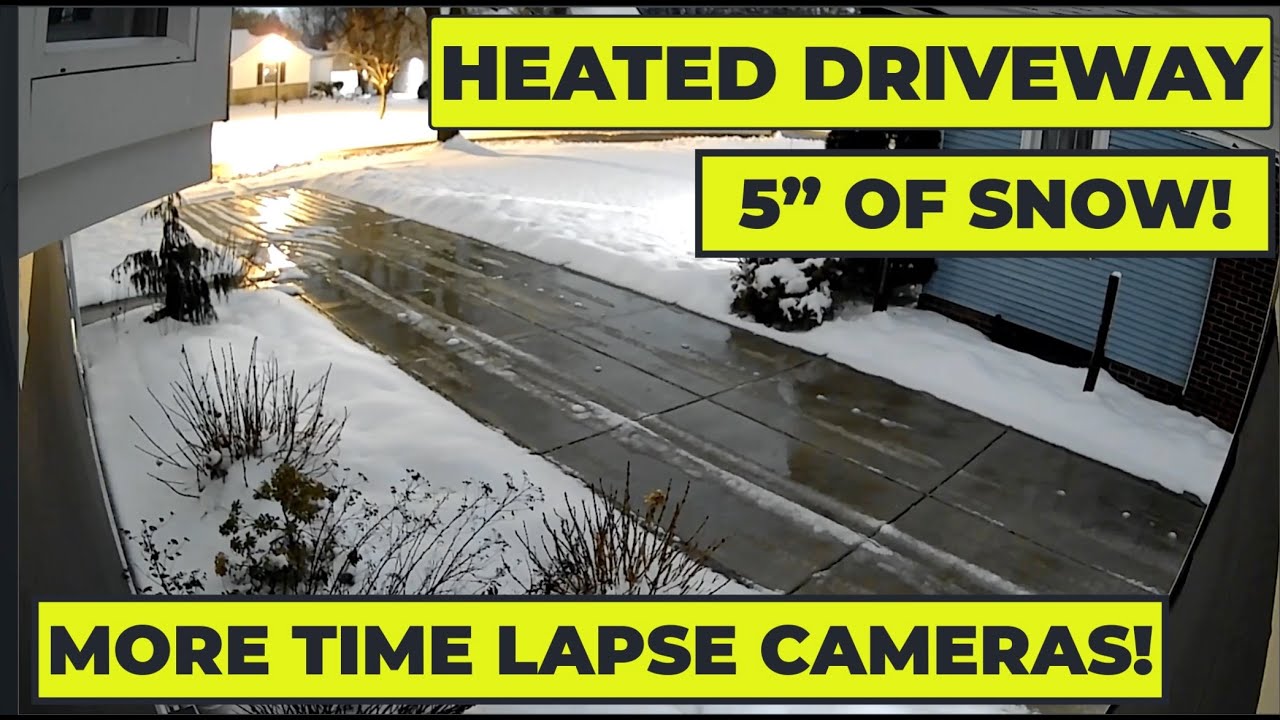
On Monday February 27th, 2023 at about 3PM it started snowing heavily in the Buffalo area. I was at work and didn't even notice until I looked out the window at 4 PM and noticed everything already covered with 2"+. The evening commute home was a disaster, and by the time I got home the driveway had already accumulated 4-5".
I added footage from the security cameras so you can watch how quickly it accumulates, and I turned on the driveway on (and started the time-lapse) around 6:20 PM.
By 2:20 AM on 2-24-23, the driveway was clear and mostly dry so I deactivated the system. By morning, it was completely dry & clear, no ice.
Chapters:
00:00 - Intro
01:38 - Camera Footage
02:44 - Time Lapse Camera 1
02:58 - Time Lapse Camera 2
03:38 - Time Lapse Camera 3
04:59 - Stats & Outro
If you’re new to my channel and want to follow this project from the beginning (in order, regardless of upload date), please visit my Heated Driveway / Snowmelt playlist which can be found here: [ Ссылка ]
The playlist will have all of my videos in the correct order form start to present, regardless of the date I uploaded them. It starts with how I designed the PEX and Snowmelt Loop Layout, shows the process of installing the actual heated concrete slab, demonstrates how I did the math to calculate the boiler and pump sizes, installation of all of the components, and ends with lots of time-lapse of the system melting snow. It also includes snowmelt system startup and shutdown videos, as well as walkthroughs of the mechanical room, continuous circulation design and electrical system.
Below are links to several of the products, tools, video equipment and channels that I used to build the system. You can find more comprehensive lists at: Http://www.cdecker.com Please note that as an Amazon Associate, I earn from qualifying purchases.
Products I used to build the system:
-Takagi T-H3-DV-N Tankless Water Heaters (2): [ Ссылка ]
-3" Diversitech Concentric Vent Kits (2): [ Ссылка ]
-Taco 0013-SF3 Circulator Pump Stainless Steel (3): [ Ссылка ]
-Taco 006-ST4 Recirc Pump (2): [ Ссылка ]
-Taco VT2218 Variable Speed ECM Pump (2): [ Ссылка ]
-100 Plate Flat Plate Heat Exchanger 400,000 BTU's: [ Ссылка ]
-Enbrighten Z-Wave Plus Smart Light Switch with SimpleWire (2): [ Ссылка ]
-1 1/2" Epoxy Coated Copper Tube Split Ring Extension Hangers (10): [ Ссылка ]
-1" Epoxy Coated Copper Tube Split Ring Extension Hangers (20): [ Ссылка ]
-1" Swing Check Valves (5): [ Ссылка ]
-10"x8" ABS Plastic Dustproof Waterproof IP65 Junction Box: [ Ссылка ]
-Waterproof Dustproof IP67 Junction Box Gray 6.9 x 4.9 x 3.9 inch: [ Ссылка ]
-Wayne PC4 1/2 HP Cast Iron Pump for Filling: [ Ссылка ]
-Ranco ETC-111000 Digital Temperature Controls (5): [ Ссылка ]
-Rubber Washing Machine Fill Hoses, 3/4 inch FHT, 8 Ft: [ Ссылка ]
Tools I used to build the system:
-12" Adjustable Wrenches (2): [ Ссылка ]
-Rectorseal No. 5 Pipe Thread Sealant: [ Ссылка ]
-Blue Monster 1/2" Blue Teflon Tape: [ Ссылка ]
-High Intensity Trigger Start Mapp Gas Torch Head: [ Ссылка ]
-14.1 oz Bernzomatic Pre-Filled MAP-Pro Gas Torch Style Cylinders (2): [ Ссылка ]
-Oatey 29025 Safe-Flo Wire Solder, 1 Lb Bulk, Solid, Gray, Silver: [ Ссылка ]
-9'' x 12'' Welding Pad Protector, Carbon Felt Torch Soldering Heat Shield, High Temp Flame--Resistant Fabric, Plumbers Pad: [ Ссылка ]
What I use to record my videos and time lapse videos:
-GoPro Hero 8: [ Ссылка ]
-Joby JB01507 GorillaPod 3K Kit : [ Ссылка ]
-SanDisk 256GB Extreme microSDXC Memory Card: [ Ссылка ]
I will be uploading more videos of the system in action each winter, as well as several videos of the installation process, including soldering, filling with glycol, venting, etc. If there is something in particular you would like to see, please ask, and I will make a video of it.
If you enjoy my content, please consider subscribing to my channel by clicking the following link: [ Ссылка ]
Music Credit:
❰Chillstep❱ Sappheiros & Almaa - Dreams
[ Ссылка ]
Link - [ Ссылка ]
#heateddriveway #snowmelt #buffalo #timelapse