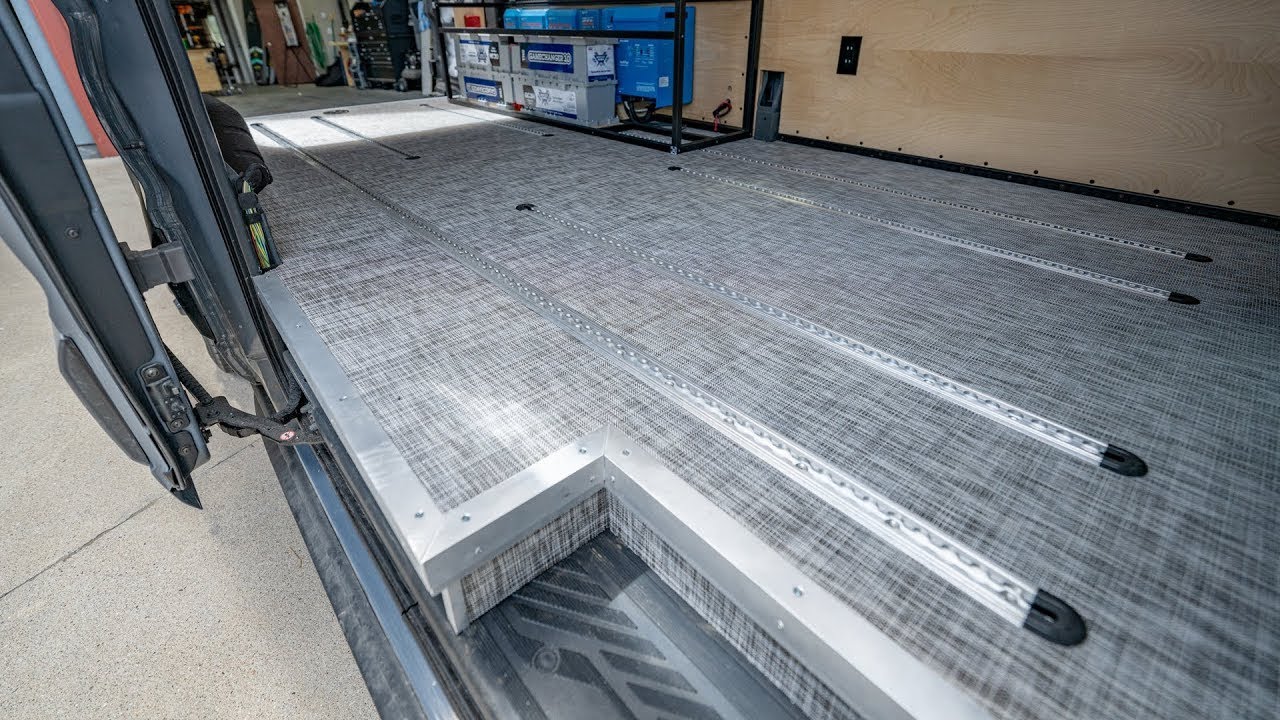
We installed high-end DIY flooring in our camper van conversion with L-Track and this video will show you step-by-step how we did it.
Sailrite Fabric: [ Ссылка ]
➤Shop the EXPLORIST.life Store: shop.explorist.life
➤Shop Battle Born Batteries: [ Ссылка ]
➤Binge the Transit Van Build: [ Ссылка ]
Here are some additional resources that you may find helpful with planning and installing your DIY Camper:
➤DIY Sprinter Camper Van Electrical Install - Full Tutorial: [ Ссылка ]
➤DIY Camper Solar Wiring Diagrams: [ Ссылка ]
➤How to Perform a Power Audit: [ Ссылка ]
➤Basic Parts & Components of an Electrical System: [ Ссылка ]
➤How to Cut Wire: [ Ссылка ]
➤How to Strip Wire: [ Ссылка ]
➤How to Crimp Wire: [ Ссылка ]
➤How to Make MC4 Connectors: [ Ссылка ]
➤How to Wire Solar Panels in Series-Parallel: [ Ссылка ]
➤How to Crimp Wire Ferrules: [ Ссылка ]
➤How to Wire an AC/DC Breaker/Fuse Box: [ Ссылка ]
Timestamps
00:00 Introduction
00:31 Making a Floor Template
01:53 What is R-Sheathing?
02:28 Cutting the Flooring to Fit the Template
03:37 Flattening the Floor With Insulation Strips
06:06 Opting out of in-floor heating
06:56 Cutting Grooves for L-Track
07:43 Rough Cut Floor Covering
08:09 Secure the Floor in Place
08:32 Gluing the Floor Covering to the R-Sheathing
09:35 Bolting L-Track to the Floor
11:04 Installing Rear Step Trim
14:01 Building & Trimming the Side Step
18:15 Installing Front Lip Trim
19:25 Trim Spare Tire Lowering Mechanism
20:23 Final Results