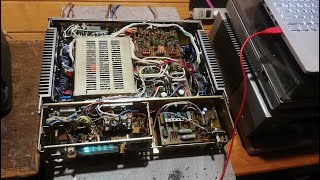
Back to the breadboard. In this experiment I use Atmega 8 microcontroller (instead of the Arduino) to control the Si4735-D60 DSP radio. The Atmega 8 has the same pinout as the Atmega 328 (used in the Arduino UNO R3) and the same internal functions, including I2C and SPI communication, but it has much less memory: 8kBytes Flash, 1kBytes SRAM, 512Bytes EEPROM. It is also cheaper than the 328. I have some Atmega 8 and I decided to use it to make a compact receiver with Si4735. The challenge was to write new control code reduced to fit the 8kByte flash memory. I made this experimental code, which doesn't use any Si4735 library, all R/W I2C functions are in the sketch, in a compact way. That way I got a very simple but very efficient AM/FM/SW receiver (update: now with SSB too).
The circuit becomes simpler replacing the Arduino by the Atmega 8, and moreover using the Atmega internal oscillator configuration (8MHz), in this case it is not necessary to use an external oscillator crystal. The Atmega 8 is powered by 5 volts. The Si4735 board has a 78L33 regulator to provide 3.3 volts to it.
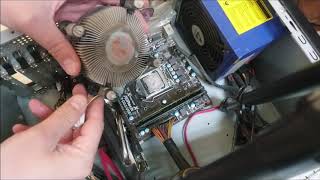
I made the Atmega 8 programming using an Arduino UNO as ISP (note), through the IDE and Minicore boards. To save space in flash, the sketch was loaded without bootloader.
Note: The Arduino ISP is an In-System-Programmer that is used to program AVR microcontrollers. You can use the Arduino ISP to upload sketches directly on the AVR-based Arduino boards without the need of the bootloader. Otherwise you can use it to restore the bootloader.
#atmega8
#si4735
#radio
µC Atmega 8 + Si4735
Теги
SI4735SILICON LABS RADIOSILABS DSP RADIOSI4730DSP RADIOSHORTWAVE RADIOHF RECEIVERHAMSSBAMFMRADIOAMADORSDRPXPYBBCCRIDIYHOMEMADE RADIO RECEIVERELECTRIC ENGINEERINGENGENHEIRO ELETRONICOARDUINOC++SWLRADIOESCUTASONYDEGENTECSUNICOMYAESUMOTOBRASSSB PATCHSI4732FM RDSRDSST7735CESARSOUNDHOMEBREW RADIOBARGRAPHband scopepanadapterfftsdratmega8atmega 8atmega328Arduino ISP