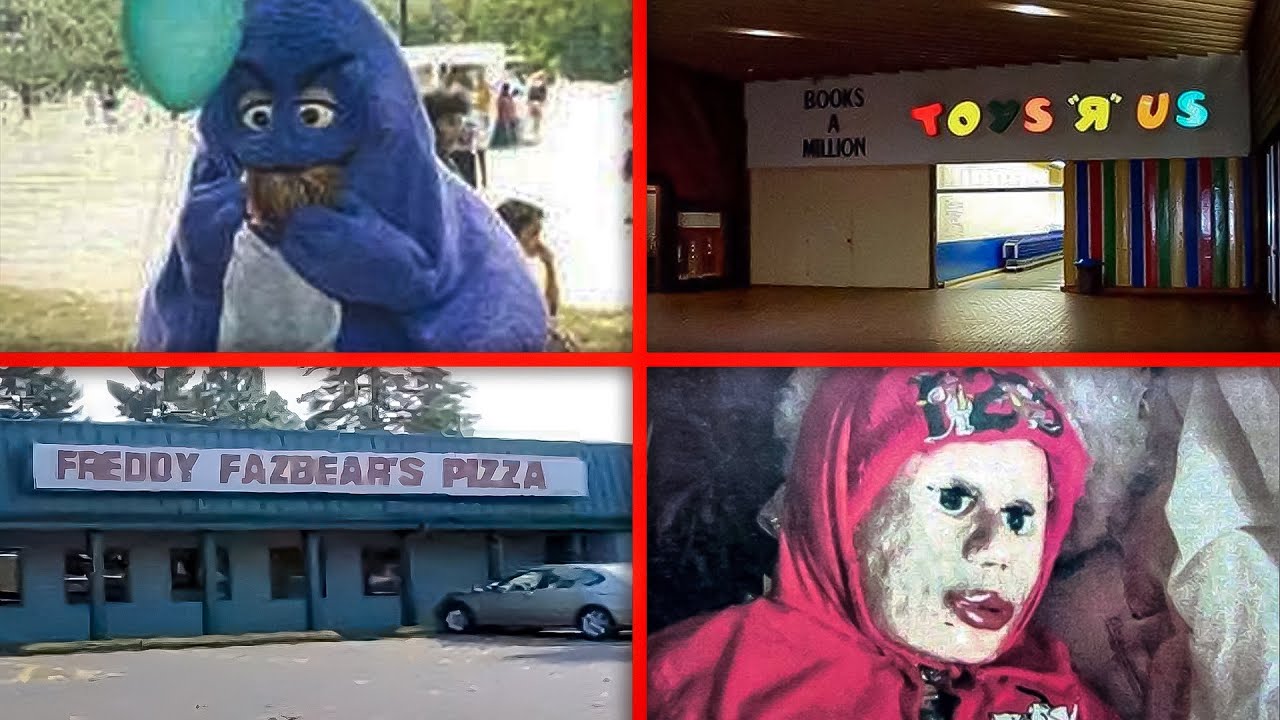
In today's video we talk about the origins of popular horror images such as the human doll, Grimace eating a child, the original freddy fazbear's location, Liminal space images and more. We also answer the question, Where did these images come from?
SHOP AT EARL!
[ Ссылка ]
Socials
Instagram: [ Ссылка ]
TikTok: [ Ссылка ]
Twitter: [ Ссылка ]
Credit
[ Ссылка ]
tags: Creepy pasta, creepy pastas, creepy pasta origins, creepy pasta photo origins, backrooms, The Origins of Disturbing Images, Where Did This Image Come From?, The Origins of Creepy Pasta Images Explained, Where was this photo taken? Grimace meme, Grimace shake , Five nights at freddys, Freddy fazbear's pizza, Liminal space, Liminal, Liminal space images, Obunga, creepy ugly guy, Dolphin muzzle, Human doll,
intro 0:00
Grimace 0:38
Obunga 3:08
Angry Munci 4:17
red gumboil machine 6:05
Creepy ugly guy 7:38
You will feed the bird 10:11
Human doll
Doll in the woods 12:40
Toys R Us 16:27
Freddy Fazbear's Pizza :17:57
Comment "tuv stole your hairline" for a cookie


![[Супер Крылья сеасон 4 Сборник] Эпизод 01~ 10 | Супер Крылья TV | Супер Крылья подзарядка](http://i.ytimg.com/vi/iAEgzRmNAeQ/mqdefault.jpg)


![Миссия "Красный" / Red One. Фильм 2024 [Дуэйн Джонсон] и [Крис Эванс] #кино #рекомендации #shorts](http://i.ytimg.com/vi/nI7XyyJjLEQ/mqdefault.jpg)


![[Супер Крылья сеасон 4 Сборник] Эпизод 37~ 40 | Супер Крылья TV | Супер Крылья подзарядка](https://i.ytimg.com/vi/i0q3-CHWwRY/mqdefault.jpg)