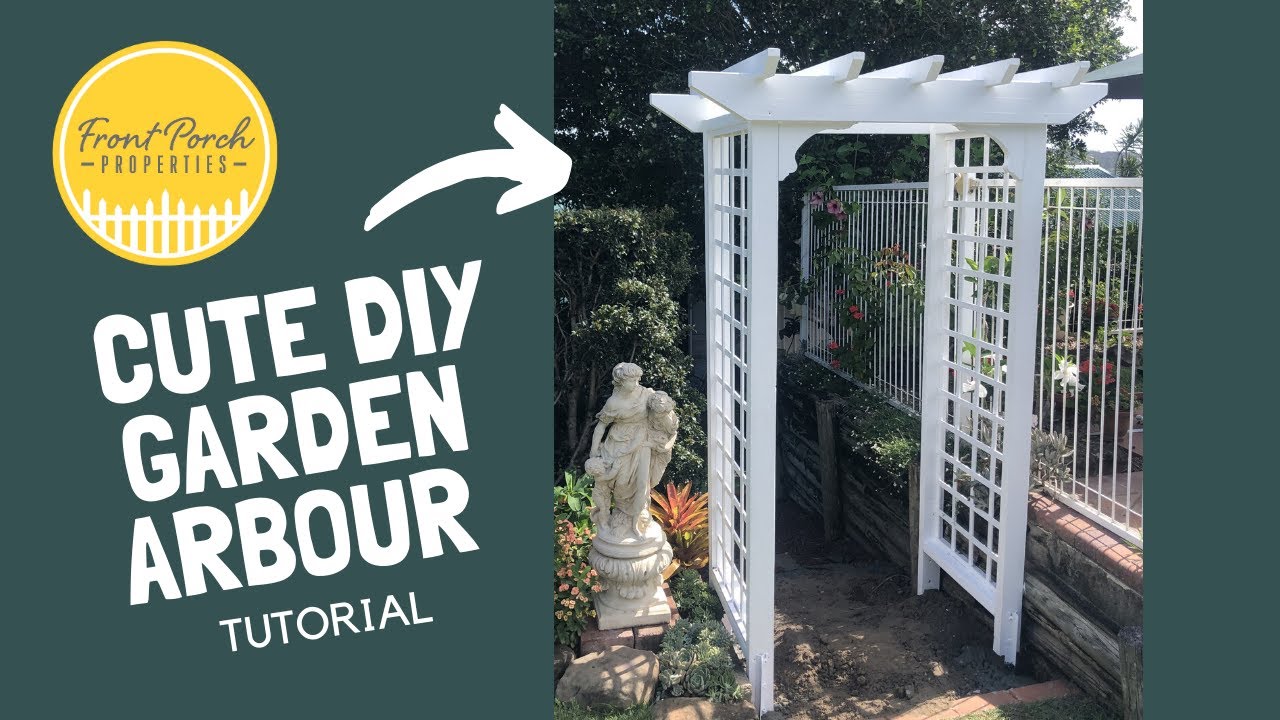
You can build this stylish, arched and beautiful DIY garden arbour for your garden easily in one day.
Arbors are perfect for framing a pretty view or dressing up a path. This stylish garden arbor idea makes your garden more beautiful. We make these types of arbors for our clients all over Australia.
In this tutorial, you will learn how to build a stylish DIY arbour for your garden. Let's explore the stylist DIY garden arbor ideas to make your yard or garden more beautiful.
subscribe here: [ Ссылка ]
If you have any questions about this arbor then please feel free to ask below.
______________________________
watch this 5 minutes tutorial on how you can build an arbour for your own backyard.
Here is the list of materials that you will need to build an arbor to frame a pathway.
You'll need a fairly basic toolbox to bring it to life, including a circular saw, drill, planer, drop saw, hammer and nail gun.
0:36 The first thing we need is framing timber to form the 4 posts of the garden arbour. Then we're going to be using this timber which will form the beams, which will run between the posts.
0:49 Framing timber to form rafters that run between the beams and can grow some vines up the side of the trellis. We're going to use some lattice as well, and this pink primed timber
Size: 90 x 35 framing timber
140 x 45 framing timber
70 x 35 framing timber
600 x 1800 lattice
18 x 18 mm pink primed pine
1:12 We have a couple of timber decorative verandah brackets too. it's really important just to make sure that you do use exterior grade H3 treated pine or any exterior grade timber to make sure it lasts a long time.
1:46 We've cut all the Timbers to length to form the four posts 1, 2, 3, 4. Because with this arbor we're doing the lattice up the two sides of the arbor, we're basically building two separate framed pieces with the top plate, the bottom plate, and then the lattice.
2:17 The two frames have been assembled and we've just used batten screws, in the end, to fix it all together.
2:35 The next step is to use this 18x18mm primed pine which will sit inside the frame.
This will become a cleat that will hold the lattice in place.
You've cut the pink primed pine which forms the cleats. just make sure you do paint the raw ends of this just to help prevent rotting.
2:59 The two side frames are fully built now and we're just using two lengths of 140 x 45mm treated pine to form the two beams that will connect the 2 side pieces. We’re aiming for roughly 200mm overhang on either side for the decorative end pieces and that will be the right proportion
3:35 Now we're going to cut a little half-moon round detail on the end.
4:52 We're going to use slightly smaller profile framing timber, it's about 70 X 35 to build rafters that go between the two beams. This is for two purposes. Structurally it will help to give it some rigidity as well as just being a decorative feature.
That's all to make this cute garden arbor. If you have any questions regarding how to build a timber garden arbour for your garden then leave a comment below or ask me anything about the DIY garden arbour idea.
My name is Rachael Turner. I'm a licensed builder in Brisbane Australia and my channel is all about DIY, home renovations, home decor, home remodeling and renovating, tips and tricks, design hacks and all useful things that hopefully can inspire you to do some things around your own home.
Want to see new videos?
To Subscribe, Click here ⇢ [ Ссылка ]
You might also like to Watch: “ sneak peak walk through of our stunning Cape Cod home” :
Click here ⇢[ Ссылка ]
Follow along on instagram or facebook:
Instagram: @frontporchproperties ([ Ссылка ])
facebook: Front Porch Properties
________________________________________________________
#gardenarbour #gardenarbourtutorial #howtobuiltagardenarbour #DIYarbor #frontporchproperties


![Пчёлка ЖУ-ЖУ-ЖУ - мульт-песенка / Часовая версия. Наше всё! [rec]](http://i.ytimg.com/vi/Z3ChHlEZkiI/mqdefault.jpg)


![Осенние листья клёна (желтые листья 1 сентября) | Футажи Красивая природа [FullHD]](http://i.ytimg.com/vi/LLkb-pFHK7U/mqdefault.jpg)


![Я здесь крыша! Я здесь все решаю! | MEOW - 19 серия [4K]](https://i.ytimg.com/vi/teM8FgTwjd4/mqdefault.jpg)