Video tutorial on how to apply a rubber coated handle to tools. The product I am using is a dip rubber coating made by Plasti Dip and is available in a few different colors. You can be limited on the length of the handles as the can isn’t incredibly deep. This is a great way to protect your tools, give them a personalized look, provide some form of insulation, and increase the grip.
Amazon links for various products used in the video for both USA and Canada:
USA:
Rubber tool dip: [ Ссылка ]
Isopropyl alcohol: [ Ссылка ]
Wax and grease remover: [ Ссылка ]
Painter’s tape: [ Ссылка ]
Canada:
Rubber tool dip: [ Ссылка ]
Isopropyl alcohol: [ Ссылка ]
Wax and grease remover: [ Ссылка ]
Painter’s tape: [ Ссылка ]
4 Ways How to Remove Rust: [ Ссылка ]
Website: [ Ссылка ]
Patreon: [ Ссылка ]
Facebook: [ Ссылка ]
Google Plus: [ Ссылка ]
Twitter: [ Ссылка ]
Instagram: [ Ссылка ]
Tumblr: [ Ссылка ]
Pintrest: [ Ссылка ]
Tools/Supplies Needed:
-duff knife
-wax and grease remover
-pliers or whatever tools you’d like to apply the rubber coating to
-heat gun
-stiff wire
-paper, cardboard, or pan
-rubber dip coating
Procedure:
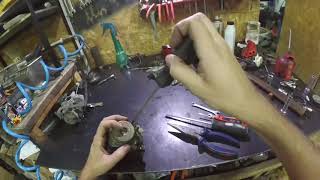
-here I have an older set of needle nose pliers which I will be replacing the rubber coating on
-as you can see, the existing rubber coating is in rough shape
-remove the existing rubber coating
-sometimes you can slide these off, other times use a dull knife to score the rubber handle and then peal it off
-the dull knife will reduce the risk of scratching the coating underneath which helps protect the pliers against rust
-now peal the rubber off
-clean up the handles using some form of a wax and grease remover which doesn’t leave a coating behind
-this will remove any contaminants which can cause adhesion problems or prevent sealing which will allow moisture in, eventually causing rust
-if your handles are rusty, this rust must be removed, otherwise it will eventually worsen under the coating
-after the rust has been remove, clean up again with a wax and grease remover and apply a light coat of primer just to the handles, where the coating will cover that up so it’s hidden
-the pliers will need to be hung up, so have something ready before we start dipping
-here I’m using a heavier wire wrapped around the tip which won’t be in contact with the coating
-use a heat gun on the handles to dry up any moisture if any which can be trapped underneath and cause corrosion in the future
-depending on the width of the pliers, you maybe able to coat both at the same time or only each individually
-mix the coating accordingly
-be sure to read the instructions on the side of the can depending on what coating you are working with
-submerge the handles and then extract them slowly
-it’s important to apply the coating on a day with lower humidity as it will affect dry time
-also do not work in windy conditions as this will cause problems as well
-it’s good practice to hang them up above paper, cardboard, or a pan to catch drips and for easy clean up
-allow them to dry for about 30min
-now apply a second layer
-finally a third layer
-you will want to apply at least three layers to provide a stronger durability
-allow them to harden and you’re done
Thank you to all those who watch my videos and support my content. Don't forget to subscribe to my channel for future tutorial videos and like my video if you found it helpful. New videos are always being uploaded every week!
© 4DIYers 2013
All Rights Reserved
No part of this video or any of its contents may be reproduced, copied, modified or adapted, without the prior written consent of the author.
How to Rubber Dip Handles on Tools
Теги
4DIYershow to rubberhow to rubber diphow to plasti dipplasti diprubberrubber diprubber coatingcoatinghandle coatingtool coatingrubber handlesplier handlesscrewdriver handlesrubber grippliers restorationpliersplierscrewdriverhandleshandlehammerpunchfilehow to apply rubberhow to apply rubber coatingtool handlestool handlerecoatcoatplastidipplasti dippingplasti dip handlesplasti dipping handlesPerformixplasti dip toolsdiy