Full Playlist: [ Ссылка ]
-
-
Watch more Learn Woodworking videos: [ Ссылка ]
Learn how to use a table saw in this Howcast woodworking video featuring Makeville Studio.
Did You Know?
Even though a table saw is capable of performing various cuts, it's best at 2 cuts in particular: the cross cut and the rip cut.
Did You Know?
Understand what a cross cut is: cutting across the short dimension of a wood plank. And understand what a rip cut is: cutting down the long dimension of a wood plank.
Tip
It's important to know which cut you're making because it will determine which kind of fence system you'll be using.
Step 1: The crosscut fence
The crosscut fence, or miter fence, helps to push the wood through a cut while maintaining a specific angle.
Step 2: The rip fence
The rip fence glides along horizontally with a tape gauge allowing for accurate measurements.
Warning
Never use the two fences together--this causes kickback.
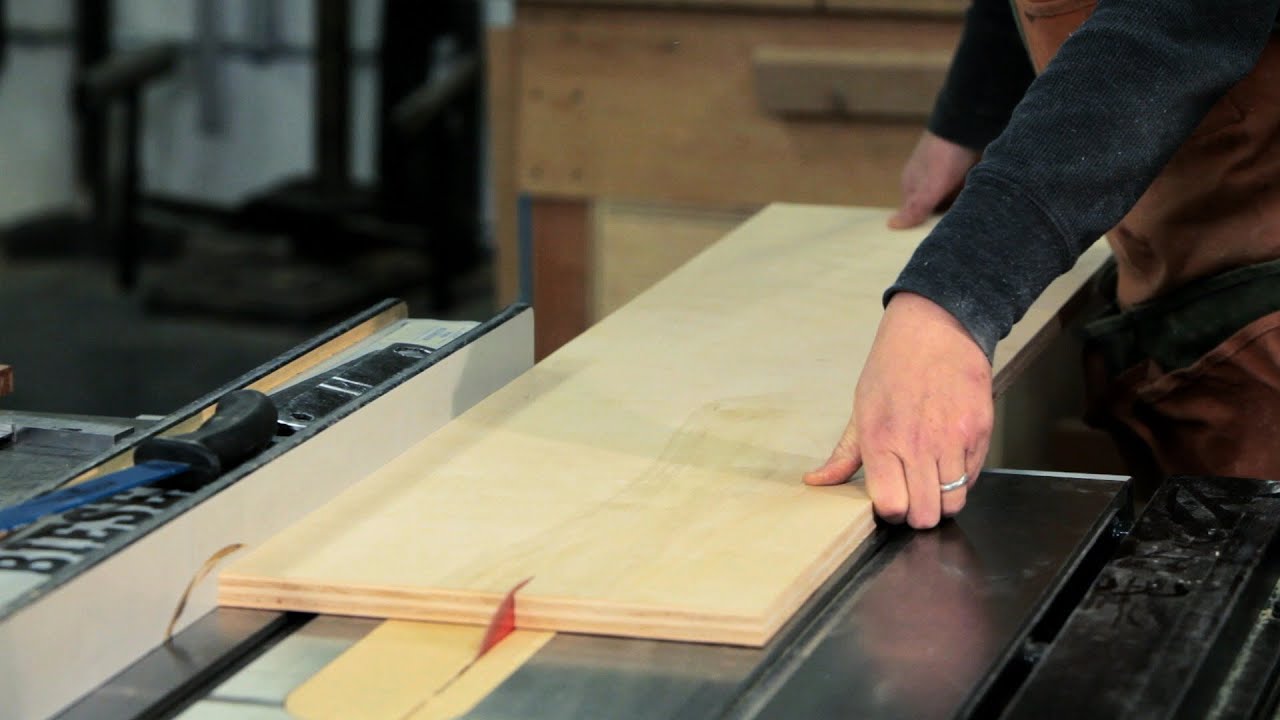
Step 3: Hand placement while cutting
Make sure you keep your hands on one side of the wood as you push it through the cut.
Step 4: Adjusting your saw
When adjusting the height or angle of the saw blade, keep in mind the optimal height should be where the surface of the wood matches the top tooth of the saw blade.
Step 5: Rip, indexing, and hand placement
When making a rip cut, be sure to index the wood against the rip fence, using your other hand to guide the plank through the cut. The hand you use to hold the plank against the fence should stay put. If you're at a distance of 6 inches or less between the rip fence and saw, use a push-stick to guide your narrow cut through.


![Пчёлка ЖУ-ЖУ-ЖУ - мульт-песенка / Часовая версия. Наше всё! [rec]](http://i.ytimg.com/vi/Z3ChHlEZkiI/mqdefault.jpg)


![[4k세로] 아마추어 모델 살색 스타킹 살스 코디 직캠 촬영 stockings pantyhose miniskirt](https://i.ytimg.com/vi/s2hxytIGxbI/mqdefault.jpg)


![Стыдно быть дешевым, сынок! | MEOW - 3 серия [4K]](https://i.ytimg.com/vi/gdpT0LkA7eY/mqdefault.jpg)