Click for more info and reviews of this Thule Roof Rack:
[ Ссылка ]
[ Ссылка ]
Don’t forget to subscribe!
[ Ссылка ]
Full transcript: [ Ссылка ]
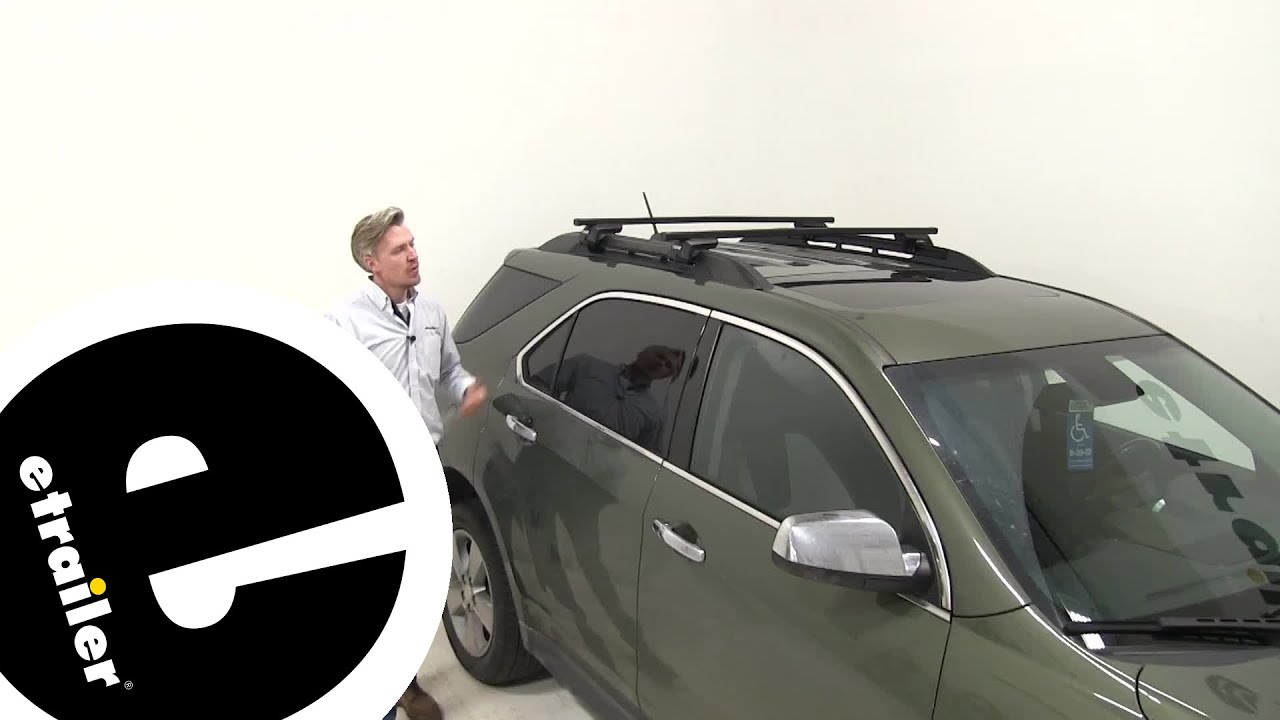
Today on our 2015 Chevrolet Equinox, we're gonna be doing a test fit on the Thule square bar crossbar roof rack system. Now this system is specifically designed to fit your raised rails on your equinox. You can see I've got it set up here, just to give you a good idea what it looks like. With this system, you're gonna be able to carry roof mounted accessories, things like bike racks, kayak carriers, cargo boxes and more.Now the square bars are 47 inches long. You can see here how they stretch across the whole roof of the Equinox. This is gonna allow us to carry not one, but maybe multiple accessories on our roof.
Perhaps, maybe two or three bike racks or maybe even two kayaks up here. They're made out of steel. They have a rubber coating, so we don't have to worry about any rust or corrosion. They're pretty well sealed. They're grooved on top right here for grip, that way they'll work with our clamp on accessories.Four inaudible 00:00:46 feet keep our square bars in place.
You can see here how they feature some rubber coating, that way they don't harm or scratch those raised rails. Now underneath our cover here, you can see our tightening bolt. The tool is included to tighten these down. It's also gonna help deter theft and prevent the elements from getting inside. Once everything's tightened down, we can put on our cover.
We can use a coin or a flathead screwdriver to tighten that up and it's gonna prevent anyone from removing our roof rack system. If you like, you can upgrade that plastic lock to a metal locking core for more security.Now this roof rack system has a weight capacity of 220 pounds. That's a step up compared to some of the other systems out there. This is gonna be able to carry a lot more weight. You do however, wanna check with your Equinox's owner's manual to see if your roof can support that much weight.Now that we've gone over the features, I'll go ahead and show you how to get it set up.
I've already got my front crossbar in place, mounted to my raised rails as you can see. The rear one installs the same way. Let's go ahead and do it together. So I've got it set up on my white table here, you could see I've got one of my Evo 00:01:48 feet mounted to the channel underneath my square bar. We just need to repeat the same process on the other side. So if you haven't already, go ahead and remove that end cap and we'll turn the bar over.Now all we need to do here is slide this portion here into the channel. It's very easy, just line it up and slide it all the way on. Now we don't need to worry about setting this to a correct measurement or number, we can adjust the bar overhang when we get it on our Equinox's roof. Let's go ahead and replace that end cap and that's pretty much it. We pretty much just set it in place on our roof.Now when we set it in place, you can set it anywhere you want along the raised rail. You do wanna set it up to where it's gonna work best with your accessories and since I'm looking for the maximum crossbar spread, I'm gonna go with the end here. Now we wanna be sure that we have the same crossbar spread on each side. So let me grab my tape measurer here real quick and we can measure it all. Okay. So I'm just gonna measure center on center and make sure I've got the same on each side. From here, we can start tightening it down. Go ahead and remove my cover here, you can see we've got our tightening bolt. I'm gonna apply a little bit of pressure. The bars on our Equinox are a little bit large, so I'm gonna push down, that way when the clamp closes in, it'll go completely around the bar. Now we don't wanna tighten it down all the way just yet. We just want that clamp to make contact with the inside of the rail. And we'll do the same thing for the other side.So we basically just wanna make sure it's the same distance from the foot here to the outside of the bar, on each side. Now i already know I need to go a little bit that way, so with everything loosely installed, I can just slightly push it. You're welcome to use a tape measurer for this or you can eye it up. Just a little bit more and we'll call it there. From here, we just tighten it the rest of the way down and we're gonna be listening for an audible click in our tool to let us know that it's properly torqued down.Should be close, feeling some resistance here. There we go. From there we can just put on our cover. And repeat the same process on the other side.Once everything's assembled and installed correctly, give it a good shake test, make sure it's not moving. As you can see it's nice and set up. We're ready to load up our favorite roof mount accessories and hit the road, but that


![[4K] Molly Haul Transparent Try-on Haul | See Through Lingerie 2024](https://s2.save4k.ru/pic/ks8yNmgygSw/mqdefault.jpg)