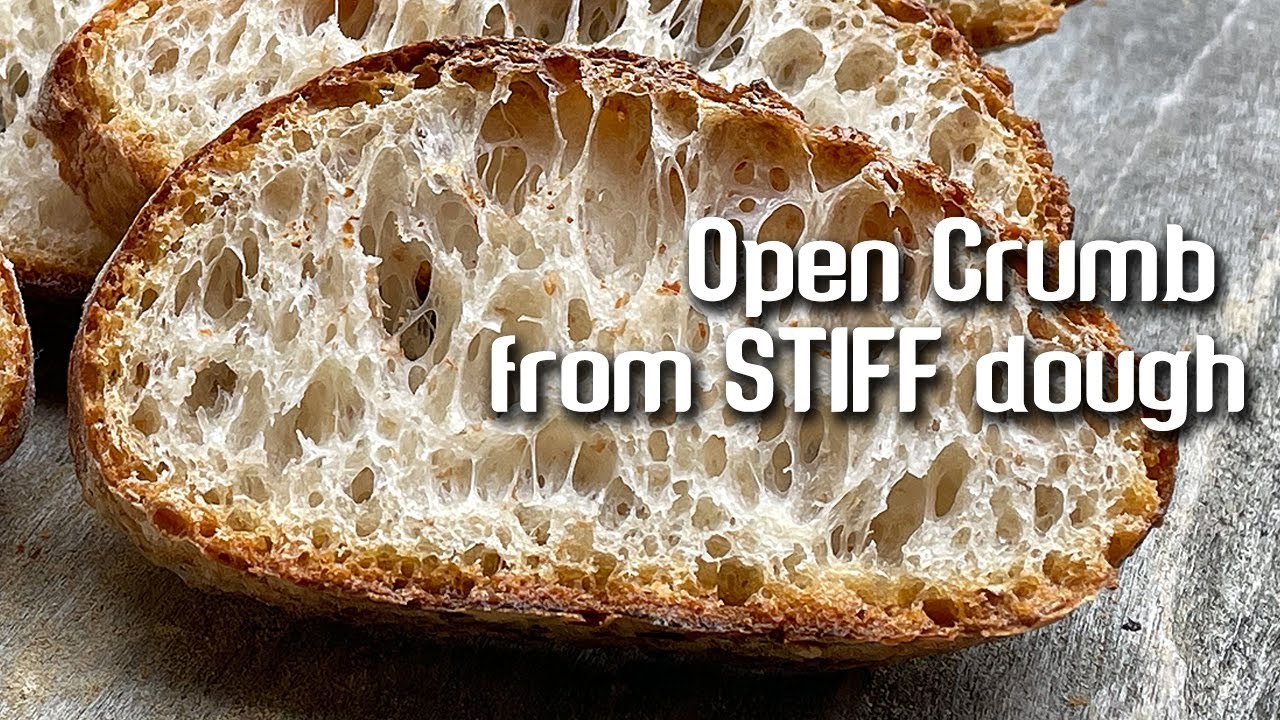
How to get Open Crumb from STIFF DOUGH?
~ special piano tune (Franklin's Waltz) by Paul Quinn - thank you very much Paul! ~
A question whose answers are not at all easy to find. We all know that high hydration loaves are more likely to have an open crumb. However, with a bit of intuition we can have a light and airy bread even at low hydration.
The equation I tried to solve was however pretty simple. I used the fact that the stiff dough will ferment very slowly and will relax in a very long time. I did the autolyse quite short (just one hour) and then kneading in the kneading machine in two steps - with the starter and with the salt (30 mins delayed). I got a very tight and tense dough that I left overnight at 22-23 degrees Celsius in a very long bulk (~12h). In the morning I found it nice maybe doubled in size, round, shiny, full of air.
But I had to make some decisions. I got some good, some bad.
Unfortunately, the dough was not very relaxed. A better decision would have been if I had chosen a flour with a lower percentage of protein ~ 12%. I decided to leave it in the fridge for another two hours in the hope that it would relax - it would become more extensible. In the two hours it did not relax much.
Another problem was the fact that the dough stuck to the glass bowl but I still detached it as simple as I could.
I decided to simply divide it into two pieces (like in my lazy bread recipe, ciabatta style). If I had shaped it, I don't think the gas accumulated in the cells would have managed to push up the weight of the (still elastic) dough. That was a good decision for the crumb I guess.
A bad decision was to pour too much water over the lava rocks at baking and keep them in the oven after the first 10 minutes (I was thinking about the second batch - I didn't want the stones to cool down). That gave me a strong crust a bit too thick for my taste.
But the crumb and the fermentation, as you can see, looks nice
Formula (for 4 "lazy" loaves - ciabatta style):
650g flour (550g white flour + 100g whole wheat)
400g water
80g sourdough starter
15g salt
Method
Mixing flour&water 3-4 minutes on low speed on Kitchen Aid; one hour autolyse; kneading 3-4 minutes with starter on low-medium speed; half hour rest;kneading 3-4 minutes with salt on low speed; one hour rest; divided & moved into two tight balls; rest for 10 hours at 22-23 deg. C; moved into the fridgr for two more hours; divided and let them rest for one hour; baked as usual on baking steel at 240deg.C with steam for 10 minutes and 20 minutes at 210deg.C without steam.
If you're like me animated by the same passion, subscribe & comments are most welcome.I have made for my followers a list of essential tools for baking bread at home. These are my personal choices based on experience so far. Remember, buying from these links makes my JoyRideCoffee journey to continue. Ad links!
New! T-shirts for home bakers: [ Ссылка ]
KitchenAid Professional [ Ссылка ]
Reusable Silicone Stretch Lids: [ Ссылка ]
Hario Kettle: [ Ссылка ]
Hario scale: [ Ссылка ]
Glass Jar for sourdough starter: [ Ссылка ]
Pyrex square dish for bulk proofing: [ Ссылка ]
Non Slip Stainless Steel Mixing Bowls: [ Ссылка ]
Danish Dough Whisk Bread Mixer: [ Ссылка ]
Silicone spatula: [ Ссылка ]
Grinder for bran (for airy whole wheat loaves): [ Ссылка ]
Pulp Banneton Proofing Basket: [ Ссылка ]
Big Bench Scraper 5 Inch x 7 Inch [ Ссылка ]
Dough & Bowl Scrapers: [ Ссылка ]
Zatoba Bread Lame: [ Ссылка ]
Bread Lame: [ Ссылка ]
Pizza Peel: [ Ссылка ]
French Baguette Baking Pan, Non-stick Perforated: [ Ссылка ]
Baking Steel Griddle: [ Ссылка ]
Natural Lava Rocks: [ Ссылка ]
Inspired by:
- Trevor Jay Wilson: [ Ссылка ]
- Kristen (fullproofbaking): [ Ссылка ]


![[ОЗВУЧКА НА РУССКОМ]"(Из врагов в любовники) Мальчик кролик"~|•| gacha мини-фильм //яой🏳🌈//](https://i.ytimg.com/vi/goM_Mv3sCsM/mqdefault.jpg)

