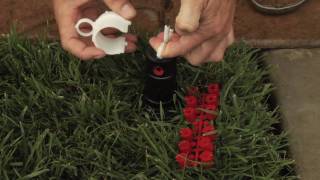
Demonstration of how to connect a CAT6 cable into an ANTSIG wall plate.
PLEASE NOTE: Some parts of this animation visually enhance the wiring. Do not strip the blue jacket beyond where it terminates. Twist in pairs should also be maintained as far as possible. Be sure to trim any excess wiring at completion.
STEP-BY-STEP
1. Using a cable stripper, carefully remove about 25mm of the PVC to expose the inner wires.
2. Slide off the outer cable layer to expose the inner wires and cartilage spine.
3. Separate the inner wires from the spine and untwist only as much wire as is needed for the CAT6 wall plate.
4. Carefully trim the centre spine cartilage, being careful not to cut any wires.
5. Straighten only as much of the twisted wires as is needed to terminate them in their respective slots (T-568A is used for this animation), then trim the cable ends.
For more related products and additional how-to guides head to our website at www.antsig.com
ANTSIG : How to Wire a CAT6 Wall Plate
Теги
AntsigAntennaCat6Data CablingData wall plateRJ45wall socket wiringcat6 cablecat6cat6 cable crimpingcat6 cable installationhow to guidehow todiy wiringinternet cablinginternet socket cablecat6 socketcat6 wall socketcat6 insertRJ45 insertRJ45 wall socketconnect cat6 cable to jackModular 8P8C Connector8P8CT-568BT-568Ayt:cc=oncat 6 connectors how to wire


![[우드카빙]모자쓴 남자 조각하기 Carve a Little Man in a Hat](https://s2.save4k.ru/pic/8eJ53TzSwTA/mqdefault.jpg)


![[PMV] Диколесье](https://s2.save4k.ru/pic/hiPsJ6FvM9g/mqdefault.jpg)