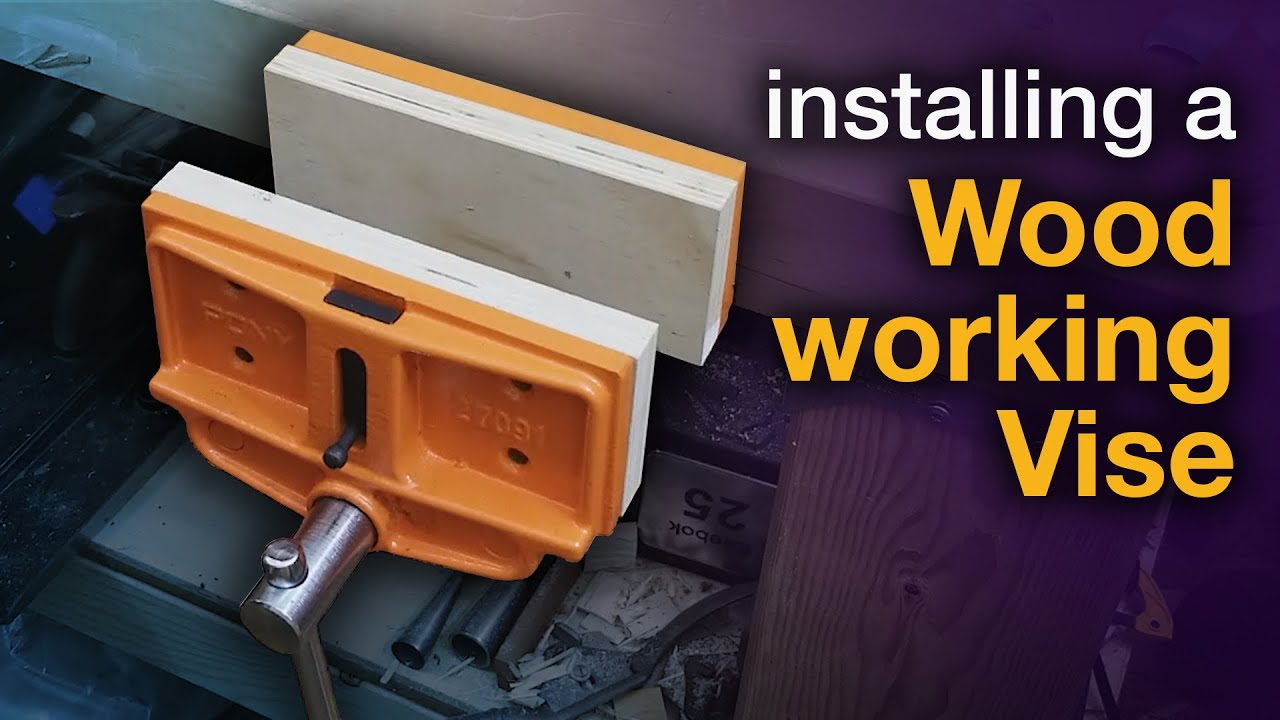
I go step by step through the process of how to install a woodworking vise. This is a great addition to a workbench, and you can never have too many vises.
I used magnets to attach the wooden jaws to the vise, rather than screwing them on.
Hopefully this will help you install your own vise.
Please leave a comment if you have any questions, and remember to like and subscribe.
Products used (affiliate links):
Pony woodworking vise: [ Ссылка ]
Cabinet screws: [ Ссылка ]
Kreg bench dogs: [ Ссылка ]
Instagram: [ Ссылка ]
Website: [ Ссылка ]
#handtools #woodworking #howto #diy #woodworkingvise #vise #installation #workbench #woodworkingtools #vice #woodworkingvice
-----------------------------------------------------------
Other tools I like to use: (affiliate links)
Empire 6" combination square: [ Ссылка ]
Stanley 12' tape measure: [ Ссылка ]
2" Marples chisel: [ Ссылка ]
2" Marples chisel (Sheffield): [ Ссылка ]
Pony woodworking vise: [ Ссылка ]
Kreg bench dogs: [ Ссылка ]
Tascam lavalier mic w/ recorder: [ Ссылка ]
2-sided Japanese rip/crosscut saw: [ Ссылка ]
Single Edge Z-saw Japanese saw: [ Ссылка ]
Replacement blade for Z-saw: [ Ссылка ]
SawStop Jobsite Saw: [ Ссылка ]
SawStop brake for 10" blades: [ Ссылка ]
SawStop brake for 8" dado stacks: [ Ссылка ]
Diablo 10" combination saw blade: [ Ссылка ]
Diablo 8" dado stack: [ Ссылка ]
Porter Cable 2-1/4 hp router: [ Ссылка ]
Titebond I - 1 quart: [ Ссылка ]
Titebond II - 1 quart: [ Ссылка ]
Titebond III - 16oz: [ Ссылка ]
Installing a Woodworking Vise
Теги
woodworking viseinstalling a visehow to install a viseinstalling a woodworking vicewoodworking projectswoodworking for beginnerswood viseworkbench visebench visewoodworking vise installationwoodworking bench visehow to install visehow to mount visewood vicewoodworkingwoodworkingwoodworkbench vicewood vises for workbenchwoodworking workbenchwood workingyost woodworking viseworkbenchworkbenchwoodworking benchvisewoodworking vice


![Жизнь – бумеранг | MEOW - 11 серия [4K]](http://i.ytimg.com/vi/q_AEQKtsUBw/mqdefault.jpg)


![Надо подсаживать новых девчонок | MEOW - 12 серия [4K]](http://i.ytimg.com/vi/1gQucwgXsWM/mqdefault.jpg)


![Ты мне доверяешь, родной? | MEOW - 13 серия [4K]](https://i.ytimg.com/vi/na7KnyXuqVs/mqdefault.jpg)


![Барыги ровными никогда не бывают | MEOW - 14 серия [4K]](https://i.ytimg.com/vi/DlqUzIT8Fsc/mqdefault.jpg)


![На коленях извиняться будешь | MEOW - 8 серия [4K]](https://i.ytimg.com/vi/u1y6kB7P6hU/mqdefault.jpg)
![Умоляю, спаси меня! | MEOW - 6 серия [4K]](https://i.ytimg.com/vi/OqpAEVecqpM/mqdefault.jpg)