Glulam HVLS Fan Installation
The following five steps will help you properly install your new Glulam HVLS Fan. Before getting started, be sure to look for missing parts, cracks and other signs of damage. Contact customer support immediately if necessary. You will also want to have the following items on hand to complete the installation: a utility ladder that extends enough for you to comfortably reach the ceiling to which you will be connecting your fan, a socket wrench, a carpentry/upholstery stapler, extra bolts, nuts and lag screws, work gloves, a broom and dust pan or a shop vacuum.
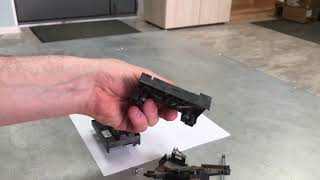
Step 1: Take the Glulam bracket and connect it to the beam by inserting the bolts at or above the halfway point of the beam on both sides of the bracket. Then, use the nuts to secure the bolts.
Step 2: Use (included) bolts and nuts to attach the power unit to the bracket.
Step 3: Connect the control panel to the beam and thread the power cord down to the designated power outlet. Secure the cord to the beam and wall with your stapler, taking care not to puncture the cord. Note: the control panel should be within 25 feet of the fan, but outside of the sweep area.
Step 4: Use the lag screws to secure the guy wires to avoid potential damage instead of wrapping them around the beam. Next, run the safety cable through a pre-drilled hole in the beam.
Step 5: Connect the blade to the unit taking care not to strip bolt threads in the process. Then examine each blade to make sure they are securely attached to the unit.
Now you are ready to try out your new fan. Be sure to refer to your warranty to find out what it covers, in terms of repairs and replacement parts, should any problems arise in the future.