Buy me a coffee:
[ Ссылка ]
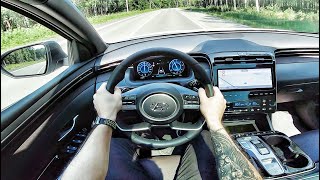
This is the part 5 and the final one. In this video I'll be replacing/installing LEDs in front footwells as well as the rear ones. The setup is very simple and straightforward. However, you need to pass the cables through the center console to be able to feed the passenger side with power.
If you've missed part 1: [ Ссылка ]
If you've missed part 2: [ Ссылка ]
If you've missed part 3: [ Ссылка ]
If you've missed part 4: [ Ссылка ]
Atmosphere Multi-color LEDs Kit: [ Ссылка ]
Other supplies and tools:
Amazon:
Single T-taps: [ Ссылка ]
Double T-taps: [ Ссылка ]
Wire stripper: [ Ссылка ]
4 pin connector: [ Ссылка ]
3 pin connector: [ Ссылка ]
2 pin connector: [ Ссылка ]
Split wire tubing: [ Ссылка ]
Wires kit: [ Ссылка ]
Zip ties: [ Ссылка ]
Wire heat shrink tubes: [ Ссылка ]
Wire heat shrink connectors: [ Ссылка ]
3M remover: [ Ссылка ]
Multimeter: [ Ссылка ]
Rotary tool: [ Ссылка ]
Electric screwdriver: [ Ссылка ]
Claw Pick up tool Magnetic: [ Ссылка ]
Flexible Hex Drill Bit Extension: [ Ссылка ]
Or AliExpress:
Single T-taps: [ Ссылка ]
Double T-taps: [ Ссылка ]
Wire stripper: [ Ссылка ]
4 pin connector: [ Ссылка ]
3 pin connector: [ Ссылка ]
2 pin connector: [ Ссылка ]
Split wire tubing: [ Ссылка ]
Wires kit: [ Ссылка ]
Zip ties: [ Ссылка ]
Wire heat shrink tubes: [ Ссылка ]
Wire heat shrink connectors: [ Ссылка ]
3M remover: [ Ссылка ]
Multimeter: [ Ссылка ]
Rotary tool: [ Ссылка ]
Electric screwdriver: [ Ссылка ]
Claw Pick up tool Magnetic: [ Ссылка ]
Flexible Hex Drill Bit Extension: [ Ссылка ]
Disclaimer: DO IT AT YOUR OWN RISK. I take no responsibility if you void your car's warranty. I don't work for any of the producers/companies that made these parts nor I'm here to endorse them. I simply provide guides on how to install these parts. Also I try to provide a good product that I'm using for my fellow 5th gen RAV4ers to save them time/hassle doing a research or buying wrong products.