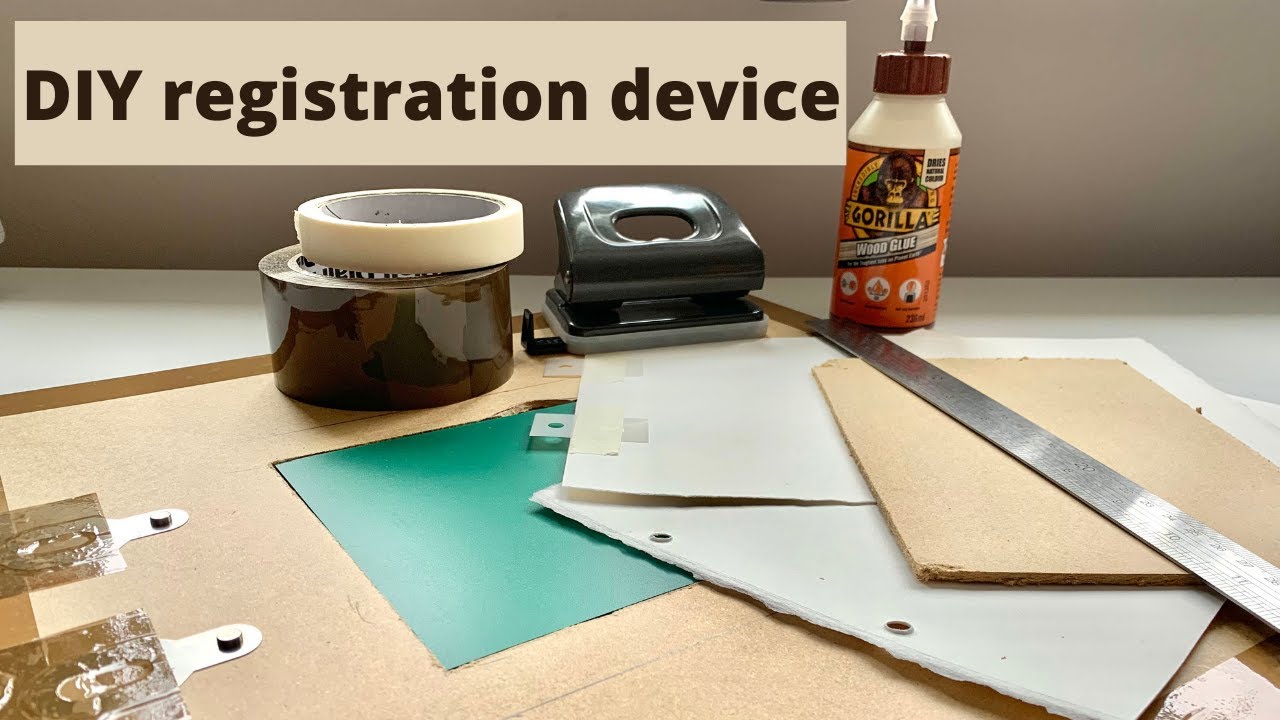
This is a quick DIY guide to making your own registration device for printmaking. Basic instructions and materials are as follows:
I am using hardboard that is 3mm thick, 405mm wide and 810mm long, I halve this to create top and base boards. I cut a hole the size and shape of the lino that I regularly use in the top board and sandwich the two together with wood glue. I offer two options for registering the paper, using either a hole punch and pins, or registration tabs and tape. These are my preferred methods for creating reduction prints as they are reusable and reliable.
You will need: hardboard, wood saw, measuring tape, pencil, wood glue, sticky tape, ternes burton registration pins, optional ternes burton registration tabs.
I will be sharing a variety of different quick guides over the coming weeks, so please like and subscribe for more content, and comment below if you have any questions.
You can find me online at:
www.heathergoldiegallery.com
www.instagram.com/heather_goldie_gallery/