UPDATE: Check out the updated version of this video with a script that makes this process simpler and gets rid of the hack of having to render an auxiliary track:
[ Ссылка ]
---
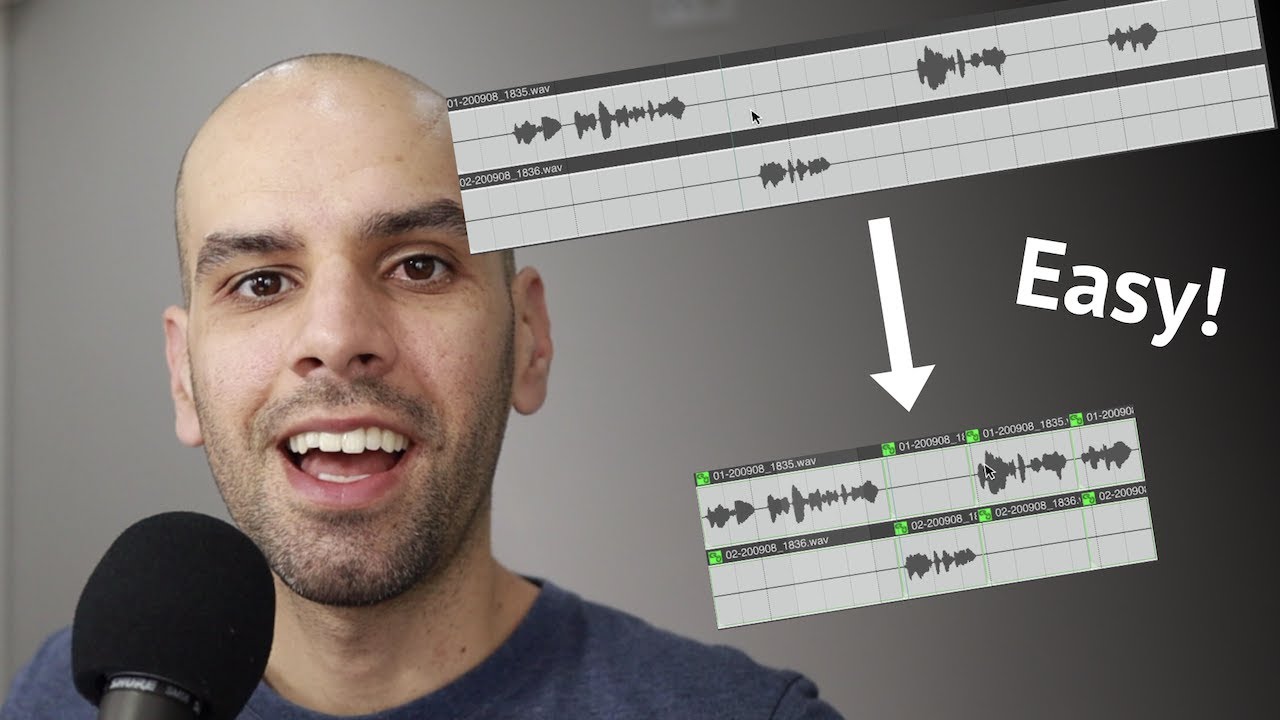
In this video I show how to truncate silence in REAPER. And I don’t mean to simply delete clips below a certain threshold (Dynamic Split), but to actually remove from the timeline the chunks of time in which no one is speaking.
This technique works even when there are multiple tracks, unlike a simple Reposition Items (see [ Ссылка ]).
You’ll improve the pace of the dialog while saving time in your editing sessions!
Before I came up with this technique, the only other applications that I knew were capable of doing this were Audacity ([ Ссылка ], Truncate Silence, but it’s destructive), and Ferrite Recording Studio ([ Ссылка ], but it’s iOS only).
Maybe someone better versed in custom actions or maybe ReaScripts can turn this into an action?
---
Extra tip: If you want to add cross fades between the chunks, select all media items and run the action “SWS: Crossfade adjacent selected items (move edges of adjacent items)”.
---
SWS ([ Ссылка ])
The extension that includes the “Reposition selected items…” action.
ReaPack ([ Ссылка ])
The extension that includes the Automixer.
---
An excellent tutorial to dive deeper into editing dialog in REAPER: [ Ссылка ]
An interview with the creator of the original automixer, Dan Dugan: [ Ссылка ]
---
I came up with this technique after watching this video of a similar technique in Adobe Audition:
[ Ссылка ]
---
Check out the video below in which I show my own modification of the Automixer:
[ Ссылка ]


![Парадокс «Гранд-отель» Гильберта [Veritasium]](https://i.ytimg.com/vi/7pKoCo_LmL8/mqdefault.jpg)