Today, we're building a budget-friendly MIDI Controller using the ESP32 with Bluetooth and Raspberry Pi Pico with MIDI over USB. There are many cheap microcontrollers on the market and picking the right one can get overwhelming. Watch to the end of the video for my recommendations. All the parts are listed below. Happy building!
0:00 Intro
0:16 What All We'll Need
1:20 Building the Box
3:45 ESP32 MIDI Controller with Koala Sampler
4:16 Bluetooth vs. Hardwired
5:14 Pico MIDI Controller with Logic Pro
6:07 Which Board Should You Choose
7:09 Subscribe!
Building Steps:
1. Download & install the Arduino IDE
For ESP32
2. For Arduino 2.0 and newer on the ESP32, go to Settings/Preferences and add Additional Board Manager URLs (remove spaces) https: // raw.githubusercontent.com/espressif/arduino-esp32/gh-pages/package_esp32_index.json
For Raspberry Pi PicoPico
2. For Arduino 2.0 and newer on the Raspberry Pi Pico, select the Board Manager icon and install “Arduino Mbed OS RP2040 Boards” (just search Raspberry Pi Pico)
3. Download & install the Control Surfaces & MIDI USB Libraries from GitHub.
4. Add the Libraries in Arduino under Sketch - Include Library - Add ZIP Library.
For Both Boards
5. Download the sketch for this project on GitHub.
6. Select your Board and USB Type under the Tools menu.
7. Upload the sketch to your device.
The code for this project:
Raspberry Pi Pico MIDI Sketch
[ Ссылка ]
ESP32 Bluetooth MIDI Sketch
[ Ссылка ]
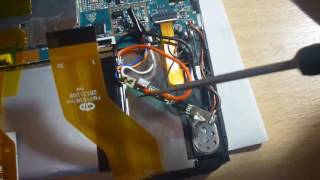
There is no schematic for this build. Each button has one pin going to an input pin on the microcontroller, and the other pin going to ground. If you can get one button working, then you should be able to figure out the rest fairly easily. The challenge is cord management, but you got this!
Software You Need (Arduino IDE and 2 Libraries):
Arduino IDE
[ Ссылка ]
Control Surface MIDI Library:
[ Ссылка ]
MIDIUSB
[ Ссылка ]
Helpful Links:
How to make a simple MIDI Controller with Arduino that works on iOS
[ Ссылка ]
Which boards are supported
[ Ссылка ]
Kalimba style MIDI Controller by RocketManRC that goes more in-depth on the ESP32's MIDI capabilities
[ Ссылка ]
Equipment:
Raspberry Pi Pico (with Pins)
[ Ссылка ]
ESP32 (with Pins)
[ Ссылка ]
Breadboards (These don't fit either board. I had to cut one in half to fit the ESP32 and remove two legs on the Pico for it to fit)
[ Ссылка ]
Arcade Buttons (EG Start work well too. Just check the sizes, 30mm)
[ Ссылка ]
30mm Forstner Bit
[ Ссылка ]
Stickers
[ Ссылка ]
Button connectors
[ Ссылка ]
Wire Kit (this wire is a little thin for the crimper, but flexible)
[ Ссылка ]
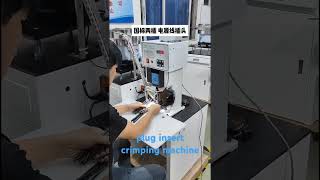
Crimper and Dupont Pins
[ Ссылка ]
Cigar Box (you might be able to find one free from a local smoke shop, but you can also get them on Amazon)
[ Ссылка ]
Thanks for watching!
Nick
Moby Pixel
Subscribe: [ Ссылка ]
Follow on Twitter: [ Ссылка ]
** Join the Moby Pixel Discord: [ Ссылка ] **