We're almost done with our IOD Gallery Wall series! If you want to watch it from the beginning, check out this playlist: bit.ly/3erumJ6
Remember the beautiful collection of DIY wall art from ONE sheet of plywood we started ages ago? (Well not ages, but waaaayyyy before social distancing was 'a thing.')
The last two pieces we needed to finish are made with the IOD Midnight Garden Transfer. Here's the do-it-yourself tutorial for the first piece and check out this video for the second piece (and LAST piece to complete your gallery): [ Ссылка ]
To see how to make a faux mitered frame or refresh on how to make the faux matte, check out this video with the Cubano piece: [ Ссылка ]
To get the plywood cut plan for this high-end DIY home decor project, check out this post on our website: [ Ссылка ]
IOD Moulds, IOD Stamps, and IOD Transfers are sold exclusively through approved stockists.
Please check our store locator to find a brick-and-mortar store near you: [ Ссылка ]
Or you can go here to find an online shop: [ Ссылка ]
Iron Orchid Designs products used in this DIY project:
IOD Midnight Garden Transfer
#diyhomedecor #diygallerywall #plywood
Contents
0:00 - Introduction
0:24 - Welcome to Gallery Wall Episode 8!
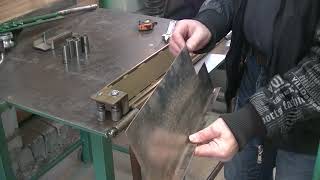
1:50 - Plywood and Gallery Wall Blanks
3:30 - Dark Blue Paint
5:41 - Coat with Sealer
7:11 - Create Faux Matte
8:21 - Why Seal the Paint?
10:54 - Midnight Garden Transfer - Left Side
14:12 - Burnish the Transfer
14:31 - Create a Seamless Transfer Image
16:11 - Gallery Wall Series Recap- New Series Coming Soon!
17:53 - Press Thumbnail Down Around Tape and Transfer
18:17 - Apply Wax and Buff
19:07 - Pull the Tape
20:33 - Gently Burnish Transfer Edges
21:08 - Paint the Frame Gold
24:50 - Let it Dry and Tap in Hanger
25:46 - Beauty Shots of the Finished Project


![Тема есть – бабки поднимем | MEOW - 9 серия [4K]](http://i.ytimg.com/vi/N_pikiZVOOo/mqdefault.jpg)


![Пару минут и тебя накроет! | MEOW - 2 серия [4K]](http://i.ytimg.com/vi/pNBJ8gGhX88/mqdefault.jpg)

![*•Страшные истории на ночь•* Gacha club/life/nox |76 часть| [час]](http://i.ytimg.com/vi/K-rUtpoB4t8/mqdefault.jpg)


![Бодаться со мной решил? | MEOW - 10 серия [4K]](https://i.ytimg.com/vi/AxctLkzD5dk/mqdefault.jpg)