Watch more Learn about Beer videos: [ Ссылка ]
You’ve made the wort and pitched the yeast. Now it's time for fermentation and bottling.
Step 1: Ferment
After you've completed Part 1 by sealing the fermenter, store the beer at room temperature in an undisturbed area. Fermentation for this brew will take two to three weeks, depending on the strain of yeast you use, and even the weather.
Step 2: Watch
As the yeast nibbles away at the malt, the beer will swirl and bubble, especially over the first few days. When you notice less than one bubble per minute, (usually after about two weeks), check the beer. If it's still hazy, then the yeast needs more time to settle. If it's clear and dark brown in color, initial fermentation is complete.
Tip
With a glass carboy, you can see the beer without opening the airlock. If you're using a fermenting bucket, you'll have to open it briefly.
Step 3: Prepare to transfer
Move the fermenter to a tabletop or countertop, wash your hands, and sanitize all equipment in a bleach solution. Place the bottling bucket, jar, bottles, caps, and capper close at hand.
Tip
You can also use sodium percarbonate, available at home-brew supply stores, as a sanitizer.
Step 4: Take a hydrometer reading
If you are using a hydrometer, take a final reading to determine the alcohol percentage of your brew.
Step 5: Boil the priming sugar
Boil one to two cups of water in a medium saucepan and add the priming sugar. Continue to boil the mixture for 10 minutes. Remove from heat, wait until the mixture stops bubbling, and pour it into the bottling bucket. Place the bucket below the fermenter.
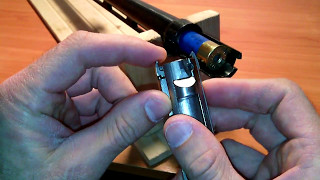
Step 6: Siphon
Open the airlock and stopper. Insert the shorter end of the racking cane, a rod used to pull beer from one vessel to another, into the tubing. Fill the tubing with clean water. Holding your thumb over the tube, dip the racking cane into the beer. Lower the end of the tube into a jar, and release your thumb.
Step 7: Move your beer into the bottling bucket
Let the initial clear liquid run into the jar or glass; discard it later. As soon as the liquid in the tube runs dark, begin siphoning it into the bottling bucket. Transfer all the liquid, stirring it gently with the spoon as you mix it with the priming sugar. Don't stir too vigorously. Leave excess sediment behind in the fermenter.
Tip
Siphoning can be tricky for first-timers. Do a trial run beforehand, using water instead of beer. You can also buy an auto-siphon at any home-brew supply store.
Step 8: Transfer the siphon
Once the bottling bucket is full, lift it off the floor and onto the tabletop. Remove the plastic tube from the racking cane. Attach one end of the tube to the valve on the bottling bucket, and the other end to the bottle-filler attachment.
Step 9: Bottle your beer
Insert the filler attachment into a bottle. When it hits the bottom, the beer will begin to flow. Fill until there's one inch of space left in the neck—the beer needs this room to carbonate properly.
Step 10: Cap
Pass off the bottle to your accomplice to crimp on the cap using the capper. Continue until the bottling bucket is empty or all 48 bottles are full.
Step 11: Condition the beer
Store the sealed bottles at room temperature for 7 to 10 days, during which time the yeast will eat the priming sugar, causing carbonation. When it's ready, chill the beer in the fridge. Never drink straight from the bottle, as there may be yeast and sediment on the rim. Pour yourself a tall one, and say hello to the freshest beer you've ever tasted.
Did You Know?
Though the 1933 repeal of Prohibition legalized making, selling, and drinking alcohol in the U.S., brewing beer at home didn't become legal until 1978.


![Стыдно быть дешевым, сынок! | MEOW - 3 серия [4K]](https://s2.save4k.ru/pic/gdpT0LkA7eY/mqdefault.jpg)


![Заключительная серия | MEOW - 20 серия [4K]](https://s2.save4k.ru/pic/YiSdxLAOmbU/mqdefault.jpg)


![Я здесь крыша! Я здесь все решаю! | MEOW - 19 серия [4K]](https://s2.save4k.ru/pic/teM8FgTwjd4/mqdefault.jpg)