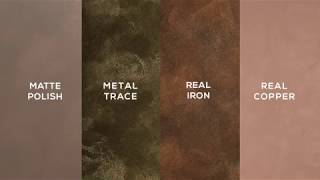
See how to apply copper patina paint to walls for an authentic finish. To achieve the oxidised copper paint effect, there are a variety of techniques that can be used.
To get this paint patina effect, we followed these steps:
0:00 Introduction
0:56 For new surfaces, apply an undercoat first
1:14 Apply masking tape to all surface edges for a clean finish
1:28 Mix the paint with a paint stirrer
1:31 Using a paintbrush and 10mm roller, cut-in along the edges and apply 2 coats of paint, allowing 2 hours to dry between each coat
1:41 Wearing gloves and eye protection, lay down drop sheets to protect the floor, then gently rotate the oxidising patina to mix it
2:02 Pour the oxidising patina into a spray bottle then spray it liberally over the entire wall
2:11 Remove the drip streams by dabbing or gently throwing a clean rag at the wall
2:25 Allow drying for at least 2 hours
2:29 Dilute the patina with water to fill in any missed areas with a finer spray
Note: For a more subtle washed out finish, dilute the patina with up to 80% water to 20% patina
2:59 To seal and protect the finish, apply 1 coat of natural clear matte with a 15mm microfibre roller
For the best paint copper patina finish, you will need these items:
10mm microfibre roller and paint tray
75mm paintbrush
Spray bottle
Gloves and safety glasses
Clean rags and drop sheets
Haymes Artisan Collection Real Copper Paint: [ Ссылка ]
Haymes Artisan Collection Oxidising Patina: [ Ссылка ]
Masking tape
Paint stirrer
Haymes Artisan Collection Natural Clear Matte: [ Ссылка ]
15mm microfibre roller
For more tips on using oxidising copper paint, talk to the experts at your local Haymes Paint Shop: [ Ссылка ]
Follow us across all social channels for more painting inspiration:
Facebook: [ Ссылка ]
Instagram: [ Ссылка ]
Pinterest: [ Ссылка ]